From a technical repair class in high school to a full time internship as tech specialist, building computers has been a long-time hobby of mine. I recently decided the time had come to build a high performance computer from the ground up for my own purposes, ultra spec gaming. Below, I will walk you through a high level overview of the steps I took and how easy it actually was to build what my girlfriend would consider her worst enemy in subsequent days.
Step 1: Outline your intent and budget
Simply put, make sure you write down and keep true to your budget and what you intend to use your future computer for. As you navigate forums and do research, it is extremely easy to find other appealing hardware or add-ons that might detract from your intended use and add to your bottom line. In my case, my purpose was primarily gaming and video editing. As you go through the steps below, keep your vision in mind and adjust the hardware you might need to satisfy your budget and intent.
Step 2: Check out boutique custom PC websites to base your configuration from
What most beginners are afraid of when considering a custom PC or when dealing with technology in general is compatibility. A very easy way to get around this without learning about every single detail and specification of each component, this is by basing your components on an ideal customized configuration on a boutique builder's website. They usually have alerts and mechanisms which prevent you from selecting incompatible components during the customization process. Here are some of the websites I used:
It is always good to keep in mind that the prices will be much lower than the ones reflected by these websites when you buy each component individually. You can typically judge how reputable the website is by its visual design and customization capabilities. Rest assured that the links I provided are from highly reliable, top-tier boutique builders.
It is always good to keep in mind that the prices will be much lower than the ones reflected by these websites when you buy each component individually. You can typically judge how reputable the website is by its visual design and customization capabilities. Rest assured that the links I provided are from highly reliable, top-tier boutique builders.
Step 3: Research online for best prices and order
By now you should have customized your ideal system online and compared options from the boutique builders mentioned above. The good news (it could be bad news) is, you will probably end up buying upgraded components once you realize the price difference from having a boutique company build your PC rather than ordering the parts and building it yourself. Even though you can be certain that all of the hardware components will be compatible after building a system online, you might not find the same case/tower for your system as boutique vendors typically only sell their branded cases with computer they build. Considerations when deciding on which case to go with are:
In my instance, the RAM I originally ordered was too tall for the CPU liquid cooling configuration from Corsair. I returned the RAM for a full refund with Amazon and purchased low profile RAM of the same capabilities. Typically, you don't have to worry about hard drive expandability and motherboard sizing options as most have standard sized and gaming case manufacturers will overkill with these options. Yes, screws are always included in the case.
I recommend visiting Newegg and Amazon to compare component pricing. For me, it was a no-brainer as to which seller to purchase from given past experiences, shipping speed, returning ease and generally lower prices. I bought everything from Amazon. I am a long-time Amazon Prime member which allowed me to purchase everything with free 2-day shipping.
A list of what I purchased:
- Water cooling/ventilation options
- RAM size
In my instance, the RAM I originally ordered was too tall for the CPU liquid cooling configuration from Corsair. I returned the RAM for a full refund with Amazon and purchased low profile RAM of the same capabilities. Typically, you don't have to worry about hard drive expandability and motherboard sizing options as most have standard sized and gaming case manufacturers will overkill with these options. Yes, screws are always included in the case.
I recommend visiting Newegg and Amazon to compare component pricing. For me, it was a no-brainer as to which seller to purchase from given past experiences, shipping speed, returning ease and generally lower prices. I bought everything from Amazon. I am a long-time Amazon Prime member which allowed me to purchase everything with free 2-day shipping.
A list of what I purchased:
- CPU: Intel i7 3820 3.6GHz (OC'd it to 4400GHz)
- RAM: Corsair Dominator 2x 8GB 1600MHz returned and replaced with Corsair Vengance 1866MHz (Low Profile)
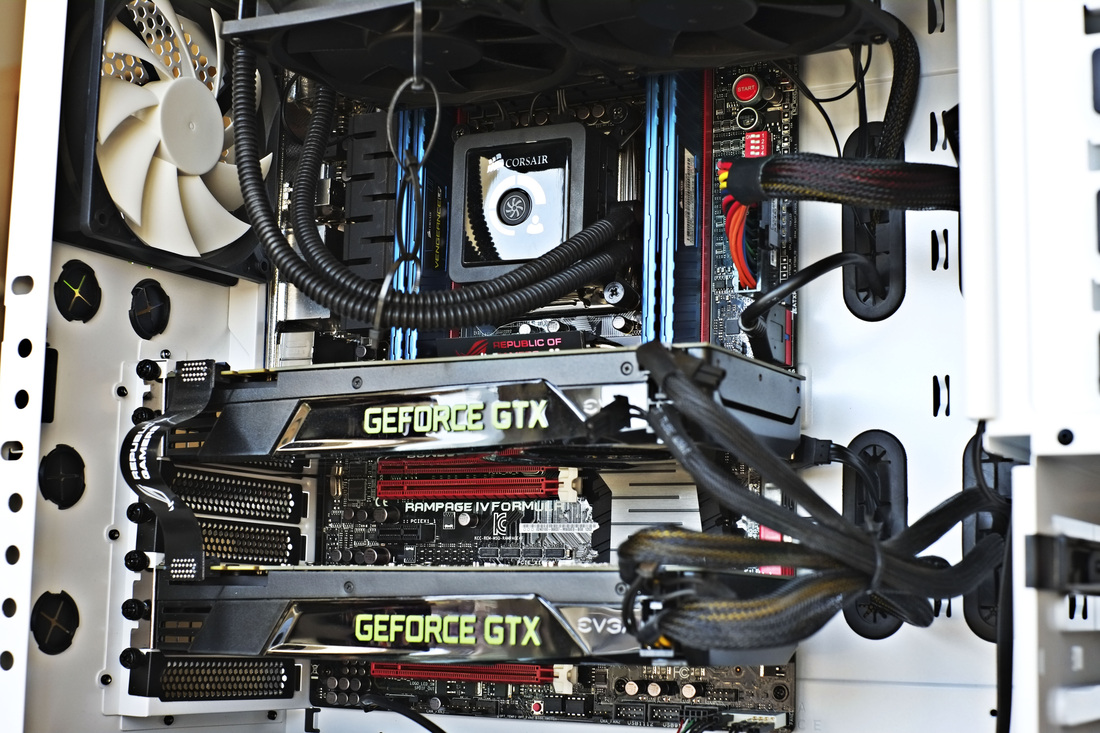
- GPU: 2x Superclocked EVGA GeForce GTX 680
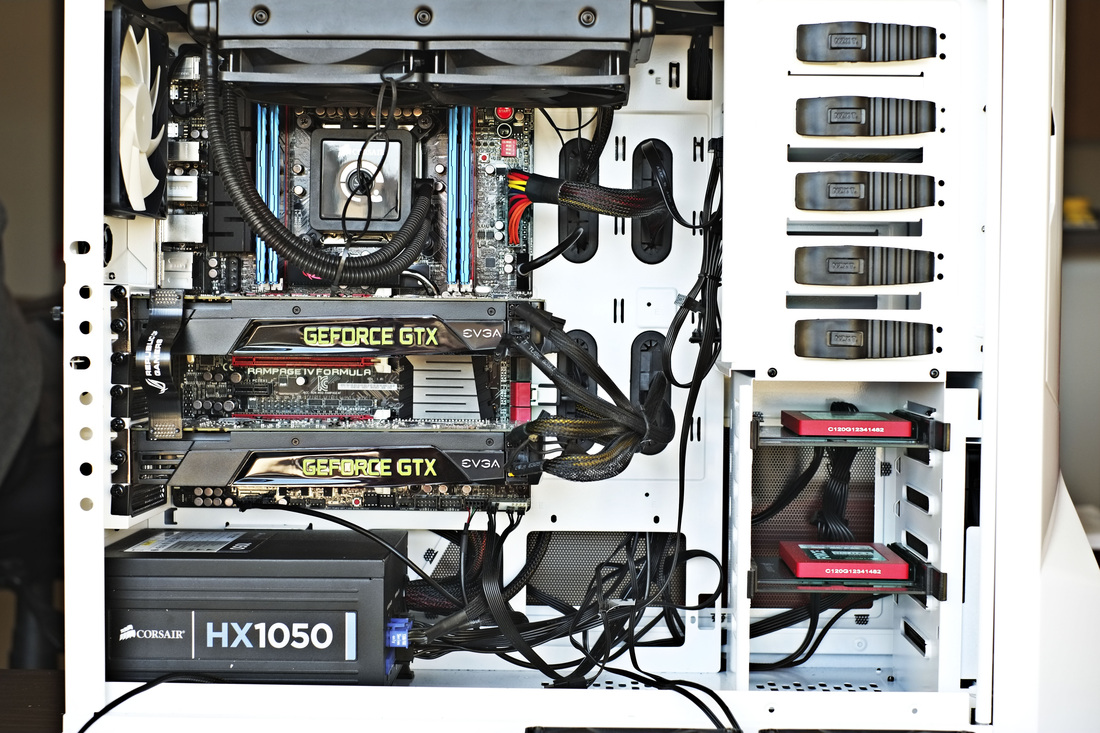
- HD: 2x Corsair Force Series GT 120 GB SATA III SSD
- Motherboard: Asus Rampage IV Formula LGA 2011 Intel X79
- PSU: Corsair HX 1050w
- Liquid CPU Unit: Corsair Hydro H100 Liquid Cooling
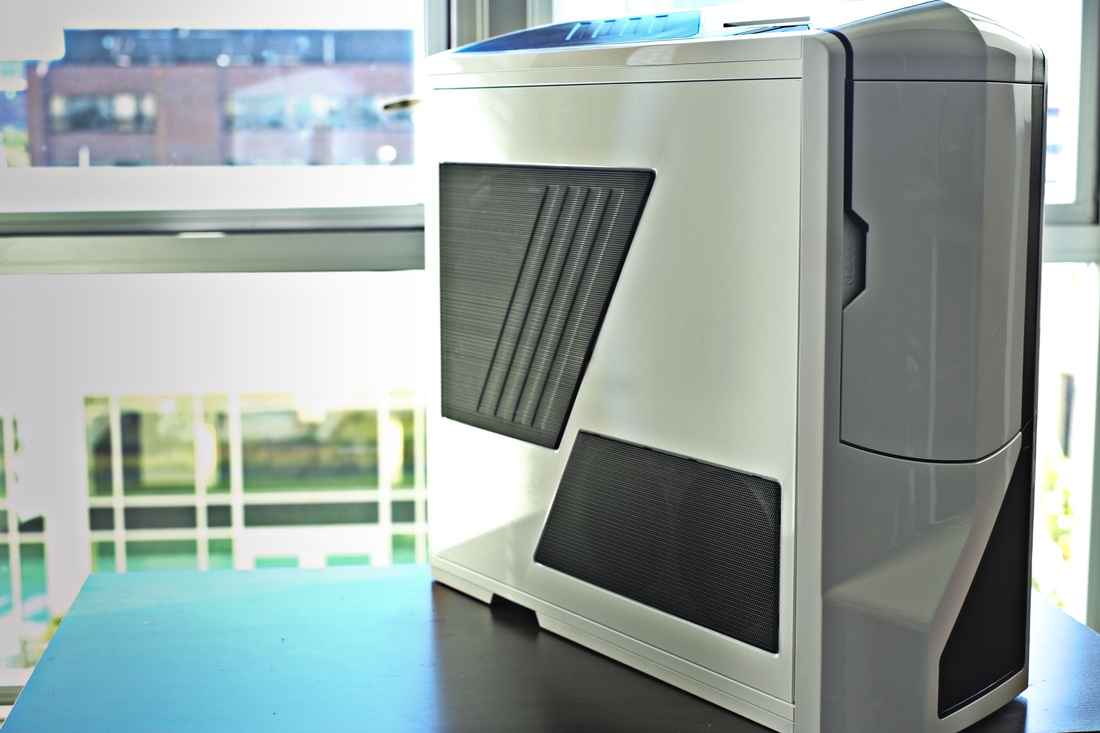
- Case: NZXT Phantom Full Tower (White)
- Additional air cooling: 2x 200mm silent fans, 140mm fan
- Monitor: BenQ XL2420T Gaming Monitor
- CD Drive: install an OS via USB as well as other drivers from the motherboard so you could easily go by without a CD drive)
Step 4: Build your rig and return/re-order parts
Chances are you will have to return a part or two due to incompatibility or post-purchase dissonance. Because of this, be sure to keep every bit of packaging in place and try to slice through tape without ripping out paint or other stickers. If you purchased your components through Amazon, returns will be a non-issue and you can easily get a re-fund for your purchase and buy a replacement in no time. As you might conclude yourself, don't wait until you get a re-fund to buy the new item. Purchase the new item immediately and rest assured you will get a refund as long as you return the item within a few weeks and in a decent condition.
Given my previous experience, building the rig itself was not intimidating or particularly hard but I can see how it could potentially feel for beginners. I recommend watching a tutorial video such as the tutorial series by Newegg one time through taking mental notes. During the build, keep each installation manual handy, especially the motherboard's and you will be good to go in no-time. The most complicated part of the build was wiring, even so it becomes quite easy once you get the hang of it. Every wire you will need plus spares will be included with the power supply unit (PSU), motherboard and video cards.
After everything is built and plugged in, try booting up your system. If nothing happens, troubleshoot by making sure everything is plugged in, the PSU is on, RAM is properly inserted, etc... Refer to the video guide mentioned above for details. If you are successful in building the system, you should be greeted with a setup screen or the text: "No operating systems found..."
Step 5: Setting up RAID and Overclocking
By this step you should have a healthy and booting computer. Before you install an operating system, configure the RAID if you would like to. If not, insert the operating system CD (or USB drive) and start installation.
A few weeks later, symptoms of instability started to arise so I increased the Vcore amount to 1.29v. It has been working great ever since.
- Setting up RAID: If you decide to configure your drives in RAID, make sure to setup your system before installing an OS. Press CTRL + i during boot (depending on your hardware) and access the HD configuration manager which will walk you through setting up RAID. I decided to go with a RAID 0 configuration. After the RAID volume is configured, slap in the OS disk and load the necessary RAID drivers when prompted. The RAID drivers are typically found in a configuration CD included with your motherboard. See "Issues I Ran Into" below.
- Overclocking: Overclocking is preferably done after you have installed an OS as you will easily be able to test the results afterward. If you decide you want to overclock your CPU or entire system (BLCK), there are great guides and entire websites dedicated to achieving an optimal and maximum OC state. Having a semi-locked CPU made it very simple for me.
- Increased the bus/core ratio (multiplier) as high the system would let me (44)
- Increased the CPU voltage (Vcore) by a marginal amount of 1.28v and still well below the maximum value of 1.35v
- Did not alter the BLCK frequency to ensure a long life for my other components
- Monitored my temperature using a Prime95 stress test for a few hours and determined it was running cool and stable enough to leave alone
A few weeks later, symptoms of instability started to arise so I increased the Vcore amount to 1.29v. It has been working great ever since.
Issues I Ran Into
- Installing the Corsair Hydro 100: Given different screw options, make sure to use the LGA 2011 screws
- Installing RAID drivers during OS installation, had to select specific drivers from the Asus motherboard CD
- OC Instability, increased Vcore after a few weeks of running at 4400GHz
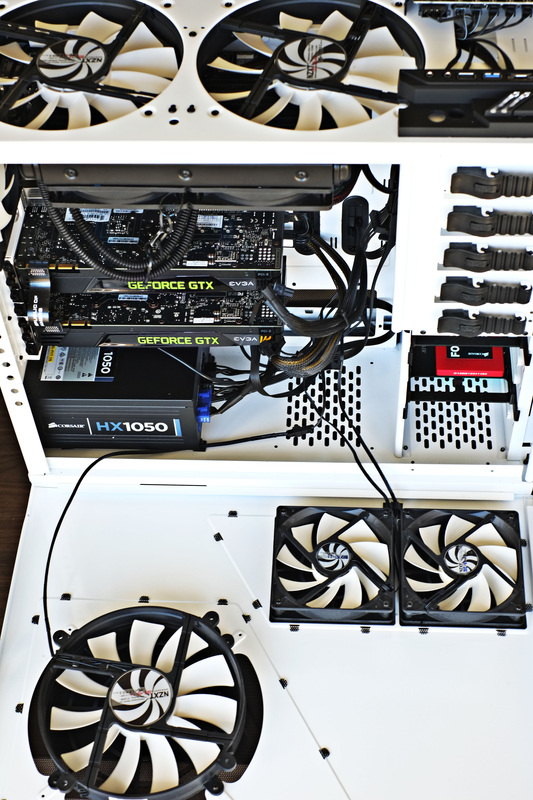
A farther out shot showing you most of the ventilation system. Two 200mm exhaust fans (top), two 120mm intake fans (door), one 200mm intake fan (door), one 140mm intake fan (rear) and lastly a 140mm intake fan which you cannot see (front). Under the PSU there is a vent for its own exhaust fan and there is an unused slot for another 120mm fan on the bottom of the tower.
